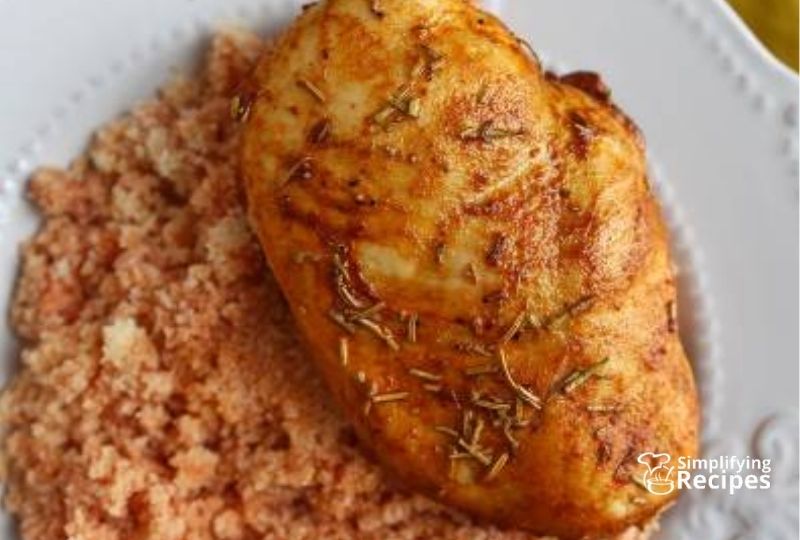
Hey everyone! Ever find yourself staring into the fridge, wondering what to whip up that’s both healthy and doesn’t take forever? Well, look no further! This air fryer chicken breast recipe is your new best friend. It’s quick, it’s simple, and the result? A chicken breast so tender, you’ll think it was grilled by a pro. Trust me on this one!
What You’ll Need (The Crew)
* Chicken breasts: Grab about two of those beautiful, boneless, skinless ones. Size will vary, but around 6-8 ounces each is a good starting point.
* Olive oil: Just a drizzle, enough to get things nice and coated.
* Your favorite seasonings: This is where you get to be the boss! I usually go for a mix of:
* Salt: A pinch or two, to bring out the flavor.
* Black pepper: Freshly ground is always better, you know?
* Garlic powder: Because everything’s better with garlic, right?
* Paprika: Adds a lovely color and a hint of sweetness. You can use smoked paprika for an extra kick!
* Onion powder: Another flavor booster.
* Italian herbs: If you’re feeling fancy, a sprinkle of these adds a nice touch.
* Optional: A squeeze of lemon juice at the end? Oh yeah!
Gear Up! (The Utensils)
* Airfryer: The star of the show!
* Small bowl: For mixing your seasonings.
* Plate: To place your seasoned chicken breast.
* Tongs: Essential for flipping without making a mess.
* Meat thermometer (optional but recommended): To make sure your chicken breasts is cooked perfectly. Safety first, folks!
Let’s Get This Party Started! (The Method)
1. Prep Time is Now! First things first, take those chicken breasts out of the fridge about 15-20 minutes before cooking. This helps them cook more evenly. Pat them dry with some paper towels – this helps with browning.
2. Seasoning Magic: In your small bowl, mix together your salt, pepper, garlic powder, paprika, onion powder, and Italian herbs (if you’re using them). Don’t be shy with the seasonings!
3. Oiling Up: Place your chicken breasts on the plate. Drizzle them with a little olive oil on both sides.
4. The Flavor Shower: Now, sprinkle that amazing seasoning mixture all over both sides of the chicken breasts. Make sure they’re nicely coated. Gently rub the seasonings in a bit so they stick.
5. Airfryer Time! Preheat your airfryer to 375°F (190°C) for a couple of minutes. This helps get things nice and hot.
6. Careful Placement: Place the seasoned chicken breasts in the airfryer basket in a single layer. Don’t overcrowd the basket, or they won’t cook evenly. If your airfryer is small, you might need to cook them in batches.
7. Cooking Time: Cook for about 10-15 minutes, flipping the chicken breasts halfway through. The exact cooking time will depend on the thickness of your chicken breasts and your airfryer model, so keep an eye on them.
8. The Golden Rule: The most important thing is to make sure the internal temperature of the chicken breast reaches 165°F (74°C). Use a meat thermometer to check the thickest part. No one wants undercooked chicken, got it?
9. Resting Period: Once cooked, take the chicken breasts out of the airfryer and let them rest on a clean plate for 5-10 minutes before slicing. This helps the juices redistribute, making them even more tender and juicy. Trust me, don’t skip this step!
10. Serve and Enjoy! Slice your perfectly cooked air fryer chicken breast and serve it with your favorite sides. Veggies, salad, rice – the possibilities are endless! A little squeeze of lemon juice at the end really brightens up the flavor.
Quick Look:
* Preparation Time: About 5 minutes (plus 15-20 minutes for the chicken breast to come to room temperature)
* Cooking Time: 10-15 minutes
* Yield: 2 servings
* Difficulty: Super easy!
So there you have it! Your guide to making the most delicious and easy air fryer chicken breast. Go ahead, give it a try! You’ll be amazed at how simple and tasty it is. And hey, if you try it out, let me know how it goes in the comments! Happy cooking, everyone!


